|
|
From the MARRS Spec RX-7 Mailing List:
Removing the AC Condenser
OK, here's the deal. The damn thing was designed and assembled like a chinese puzzle (or Japanese in this case). So, no amount of skill and logic are going to lead to an "elegant" removal and replacement. I wound up using considerable brute fore to remove the core(evaporator) housing, breaking the plastic housing in several places. Fortunately, the thing can be glued back together with the special "plastic" cement that hardware stores carry.
- Removal of the passenger seat makes the job much easier. (Remember my rules debate argument? Removal is a 4 bolt, 5 minute job.) It also helps considerably to unbolt and remove the right side roll cage door bar.
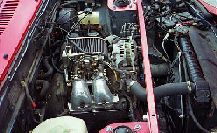
- With a hacksaw blade holder (sure you have one of those Ed -grin), saw off the threaded fittings where the core lines pass through the firewall. Obviously, this is done from the engine compartment. This only takes a moment, and it makes the thing much easier to remove.
- Lie on the passenger side floor and look up under the right side dash. The cousing box housing is identified as a large "squarish" plastic box, about 10 inches on each side, just adjacent to the rather obvious blower assembly. There are two 1- inch wide metal band clamps on the input/output connections of the box. The "input blower" connection is square in shape, the "output" is triangular. The box is held in place by two 10mm nuts, one accessible on the bottom, and one that I could find no way to access, on the top. The drain hose out the bottom is a dead giveaway that you have found the right component.
- With a pair of channel locks, grasp the rubber drain hose and wrest it out.
- Remove the bottom (accessible) 10mm bolt, loosen the two band clamps completely (actually, as I recall, only one can be loosened, other has hidden screw, but that is enough). You are now ready to apply a considerable amount of wrenching and twisting force to remove the box. You will crack the top attachment off at the firewall, but you can mend this with your plastic glue.
- Once you have the assembly out, you can split the two-part housing by removing with a screwdriver all the little clamps around the seam. Once split, the core can easily be removed and the housing can be reassembled and repaired.
- still haven't reinstalled mine, but I have a couple of thoughts. Since the housing is now quite light, you can get by without the cursed top attachment bolt, the plastic bracket of which will be broken anyway. Just as well because you can never get at the bolt to reattach it. So, to reinstall, simply force it all back together with prerequisite wrenching, grinding and cursing, attach the bottom 10mm bolt, reinstall the two bands, and use any necessary amount of racer's tape for support. As a final touch, buy two hole plugs at the hardware store to seal the firewall holes, and you're finished.
- An alternate approach might be to split the housing in the car and not remove the top half, thereby preserving the top bracket.. But, that isn't easy either, since some of the seam clamps are inaccessible. Having been through the removal, I don't see an elegant solution. Brute fore, breakage and repair seems to be the proper mode<g>.
- Since the A/C was an "option," there is a possible interpretation of the rules which says that the housing does not have to be reinstalled, and that a simple large hose between the blower and the heater box is permissible under the rules. That would make the entire operation much easier. McGiggle, Sweeten, DePedro, any feelings on that? Do we know what a non-A/C car looked like in that area? This could hardly be considered gutting, since the sole purpose of the large plastic housing is to contain the A/C core.
Hope this helps.
Jim Epting
|

